Home Assistant Entities Explained
What are all of these entities!?
Home Assistant Entities
After adding the EP1 to Home Assistant, you may wonder which sensors you can use and what they do.
To view all of the sensors and entities, click on the device from the ESPHome menu:
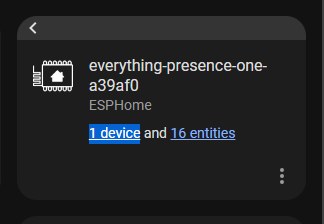
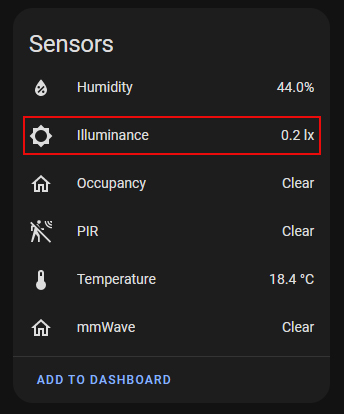
This will show you a dashboard of all of the sensors and controls inside of Home Assistant that you can use in your Automations:

Temperature, Humidity and Illuminance
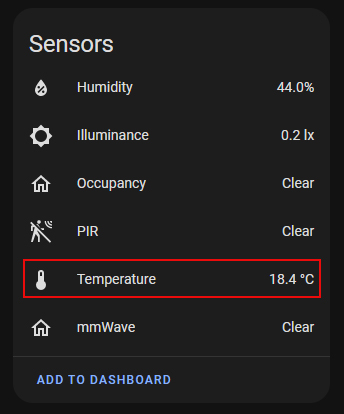
Temperature is the current room temperature as measured by the on-board temperature sensor and is given in celsius. This sensor supports a configureable offset allowing you to adjust the reading. See the advanced section for how to do that.
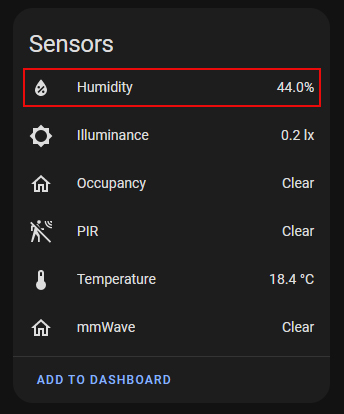
Humidity gives a humidity sensor reading in percent for the room:
Illuminance is measured from the on-board light sensor in lux. There are slots at the side of the EP1 case that allow for light to pass-through and be measured, so make sure not to obstruct these for the best readings.
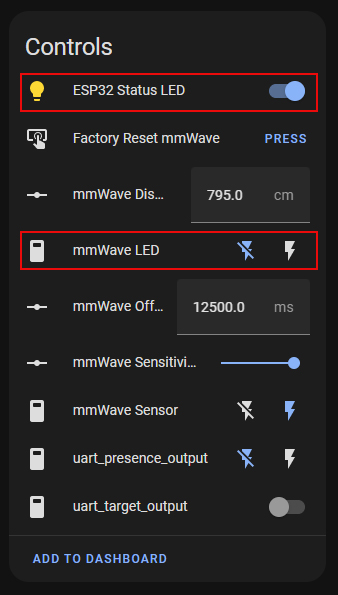
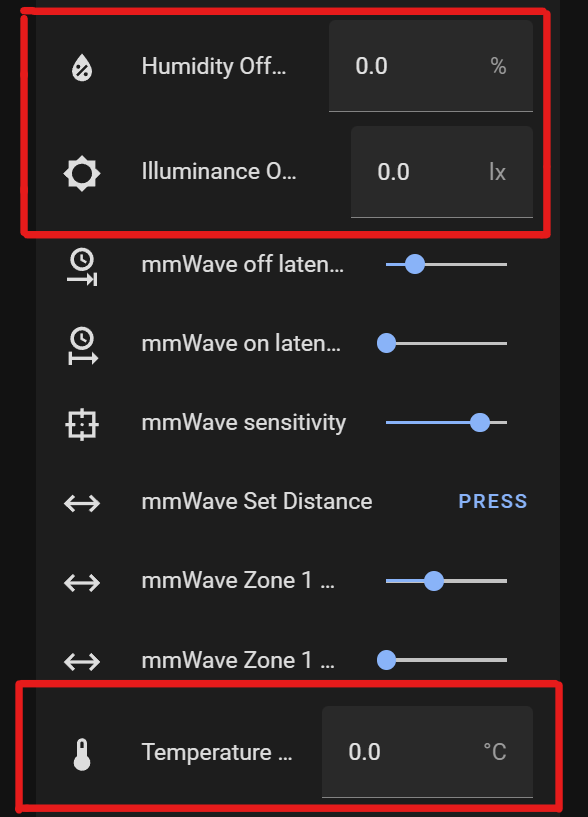
Temperature, Humidity and Illuminance all support configurable offsets using the UI (if you don’t see these entities, make sure to update to v1.16 or higher) which allows you to offset the reported value on the fly to calibrate each of these sensors for your environment. You can do that with these highlighted controls under the configuration section:
mmWave, PIR and Occupancy
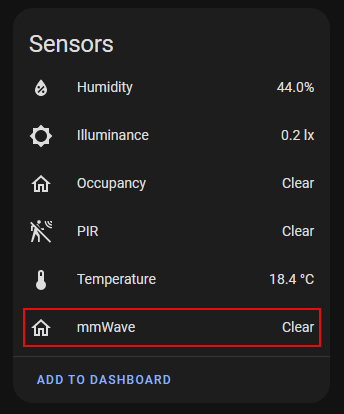
You will find a sensor called mmWave - this is the output from the mmWave sensor directly and indicates if movement is detected. The mmWave sensor has a configurable offset for the “Blind time” which we will cover below. The default blind time is 12.5 seconds, which is basically how long the sensor takes to go to an “Off” or “clear” state after motion has stopped being detected:
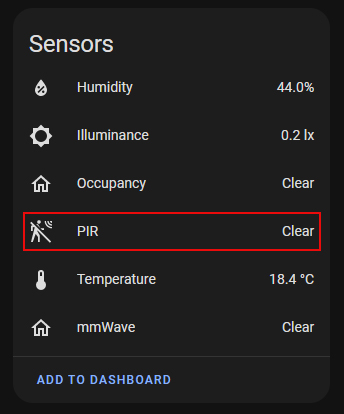
The PIR sensor indicates if motion was detected or not. It also has a user configurable timeout period, which by default is 10 seconds. This means that it will take 10 seconds after the last motion for the PIR sensor to go back to the “Off” or “Clear” state:
Occupancy is a combination of the mmWave and PIR sensor. If either the mmWave or PIR sensor detects motion, Occupancy will be “On” or “Detected”. Both the mmWave and PIR sensor must be clear before Occupancy will change to the “Off” or “Clear” state. This is the sensor that you will generally want to use in your Automations. This also has a user configurable timeout period.
Offsets for mmWave, PIR and Occupancy
All 3 sensors have configurable timeout periods that can be set, which allows you to fine-tune for your environment. 1 of these can be configured directly from the Home Assistant UI, and the other 2 require adjustments to the ESPHome code (ESPHome doesn’t support UI sliders for these yet).
The mmWave sensor has an adjustable timeout period inside of Home Assistant using the mmWave Off Latency control. The value is measured in ms and the default is for 12500ms (12.5 seconds). I generally wouldn’t recommend setting this below 10s.
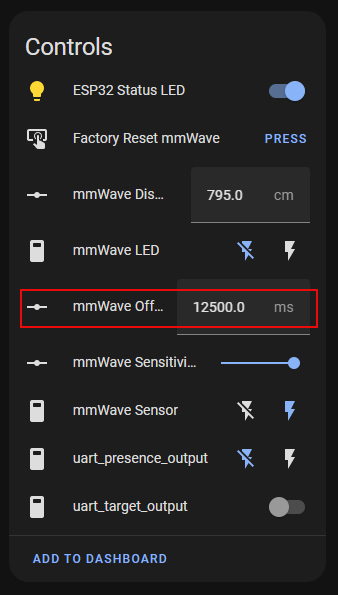
On Latency configures a delay of how long motion must be detected for before the sensor will change to “detected”. It’s also really useful for filtering out detections from unwanted objects - see the tuning guide for more information.
The PIR and Occupancy sensor off-time needs to be configured with ESPHome code due to ESPHome not supporting dynamic values for these in code. See the Advanced page for how to edit the ESPHome code.
Distance and Sensitivity (SEN0395)
The SEN0395 mmWave sensor has a configurable Sensitivity and Distance control inside of Home Assistant.
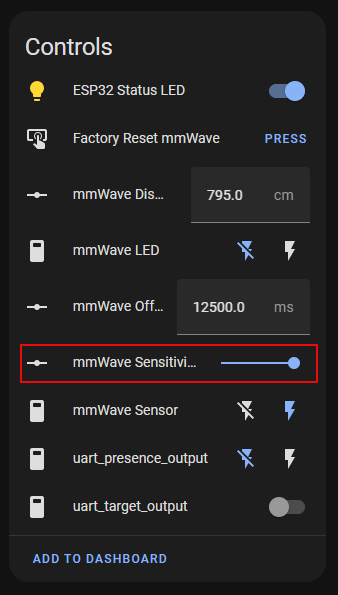
Sensitivity allows you to adjust how sensitive the mmWave sensor reacts to movement - this can be useful to configure in rooms where slight movements by something not Human triggers the device (this cannot filter out non Human objects like fans or pets) - see the tuning guide for more information:
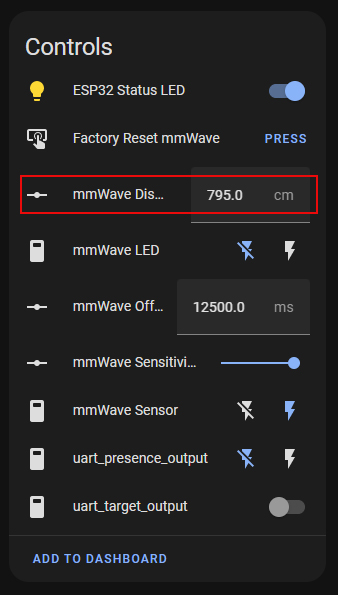
Distance allows you to adjust the max range of the sensor, up to a maximum of 8m. Please note that 8m is the max range, but doesn’t nessecarily mean the sensor is capable of detecting the tiniest of movements at 8m - placement is still important for the best results - see the tuning guide for more information:
Distance and Sensitivity (SEN0609)
The newer SEN0609 mmWave sensor has 2 individual controls for sensitivity and 3 individual controls for distance inside of Home Assistant.
Sensitivity allows you to adjust how sensitive the mmWave sensor reacts to movement - this can be useful to configure in rooms where slight movements by something not Human triggers the device (this cannot filter out non Human objects like fans or pets) - see the tuning guide for more information.
The SEN0609 has 2 controls for sensitivity - Sustained Sensitivity and Trigger Sensitivity:

Trigger Sensitivity allows you to configure the sensitivity level to do the initial trigger of the sensor (to make it go from clear to detected). This is on a scale of 1-9, where 1 is the lowest sensitivity and 9 is the highest.
Sustained Sensitivity allows you to configure the sensitivity level AFTER the initial trigger, and is the sensitivity level to keep the sensor detecting. This is on a scale of 1-9, where 1 is the lowest sensitivity and 9 is the highest.
One scenario this can be useful, would be to prevent a small movement triggering the sensor (say a curtain moving in the wind) when the room is unoccupied, but allowing enough sensitivty to trigger when someone enters the room and then keep detecting them sitting down or sleeping with very little movement.
You MUST press the “Set Sensitivity” button in order to send the senstivity settings to the sensor after changing the sliders. No change will take effect without pressing this.
Distance allows you to adjust the max range of the sensor, up to a maximum of 25m. Please note that 25m is the max range, but doesn’t nessecarily mean the sensor is capable of detecting the tiniest of movements at 25m - placement is still important for the best results - see the tuning guide for more information.
The SEN0609 has 3 controls for distance too - minimum Distance, maximum distance and range reduced:
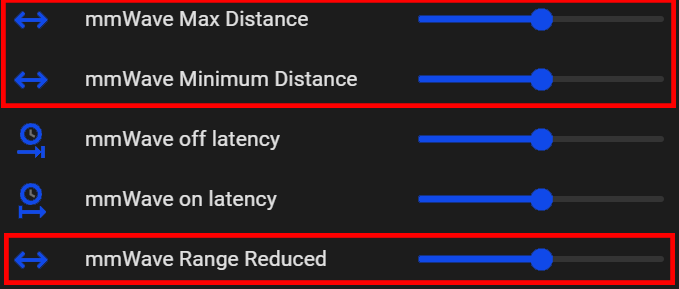
Minimum and maximum are pretty self explanatory - they allow you to set the operating distance for the mmwave sensor, so that only movement that is within these two values will be considered occupied. For example, if you have the minimum value as 3m, and the maximum value as 6m, then only movement that occurs between 3m and 6m will cause the sensor to trigger.
Range reduced is a new addition that let’s you set a smaller distance that will be used only for triggering the sensor. The value is subtracted from the maximum distance. For example, if you have a maximum distance of 10m and a range reduced of 1m, the sensor will only trigger when a target is within 0-9m (10m - 1m = 9m). Once a target is detected, it will continued to be detected until they go over the 10m mark at which point the sensor will go back to unoccupied.
This can be useful for setting a smaller trigger range to help with false positives that might occur at the edge of the sensors detection range.
You MUST press the “Set Distance” button in order to send the senstivity settings to the sensor after changing the sliders. No change will take effect without pressing this.
Distance (Beta - SEN0395 only)
If you have updated to the beta firmware 1.23b, you have access to target tracking and distance zones.
Distance on the beta firmware works differently than was previously implemented. Previously, distance was set using a single slider which would set the maximum distance the sensor would monitor, meaning the sensor would monitor anywhere from 0cm up to the value you specified in the distance slider (see distance section above).
With 1.23b, distance zones have now been added. This allows you to set up to 4 different zones to track, which is extremely useful if you want to exclude an area, for example if you have a fan that triggers the sensor, you could use distance zones to exclude the fan.
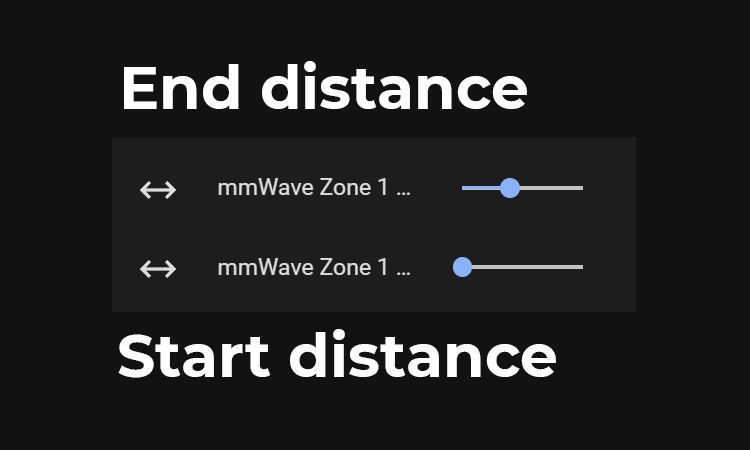
Distance zones work by defining a start and an end distance for each zone. By setting a start distance and an end distance, the sensor will only trigger for movement within that range. The distance refers to the physical distance from the sensor - e.g if you set zone 1 to start at 105cm and the end distance to be 315cm, the sensor will only trigger if there is movement between that range. Up to a maximum of 4 zones is supported.
By default, only one zone is an enabled entity in Home Assistant, so as to not overwhelm new users:
If you would like to enable zones 2, 3 and 4, simply click on the entities not shown message:
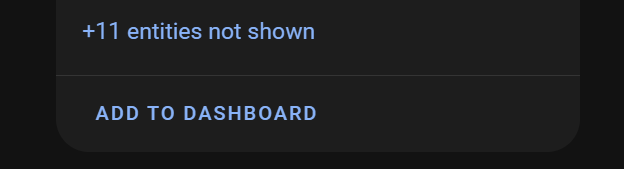
To reveal entities that are disabled by default:
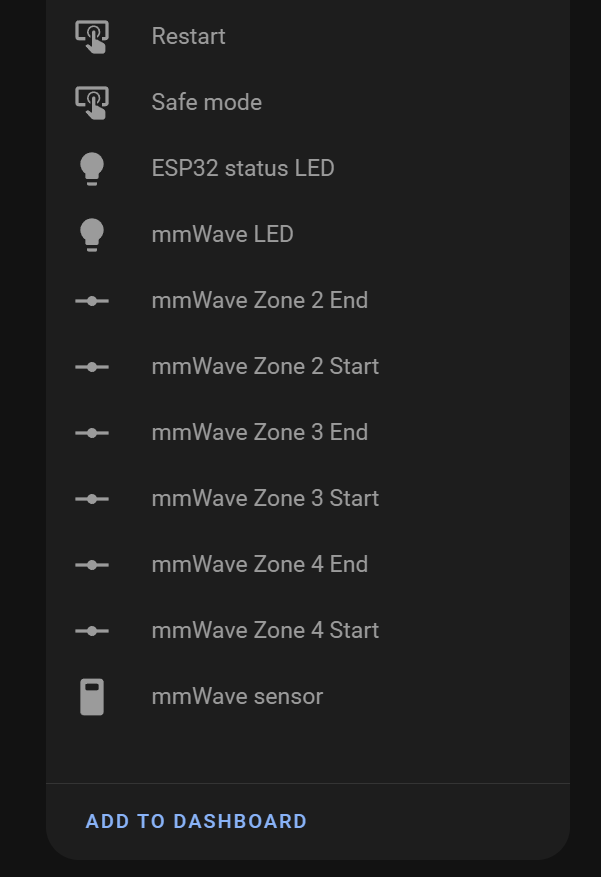
Click the entity you want to enable, then click the settings icon in the right hand corner of the popup. Then enable the entity:

Wait 30 seconds, refresh the page and the entity is now enabled. Repeat this for each entity you want to enable (start and end zone for example).
To setup distance zones, set a start and an end distance for each zone you want to monitor. If you do not want to use one of the zones, leave both the start and the end point set to zero. This is important!
This is very much in beta, so some rules to keep in mind:
- Zones cannot overlap each other
- The distance of a zone must be a greater distance than the previous zone. I.e, Zone 2 must not have a lower start and end distance than Zone 1.
- If you don’t want to use one or multiple zones, leave the start and end distance set to 0 and it will not be included.
- If you want to replicate the previous functionality, i.e you want the sensor to measure everything from 0cm to 510cm, set zone 1 start to 0cm and the end to 510cm. Then set zone 2, zone 3 and zone 4 start and end point to 0.
You MUST then hit the “set distance” button in the UI for these zones to take effect. Previously, the updated value for distance would be set to the sensor immediately as soon as you changed the slider. This is no longer the case and the set distance button must be used before new values will be sent to the sensor. This is because updating the sliders immediately could cause the sensor to get confused if the user hasn’t quite finished setting up the zones yet.
If you make a mistake configuring the zones, the sensor won’t accept the value and nothing will change, but the UI sliders will indicate it has, making it difficult to know. This is a beta/advanced feature so I do want to improve the feedback from the sensor for this to make it more obvious if something didn’t work, but there is a text sensor that will update to show you if the zones were sent correctly or not:
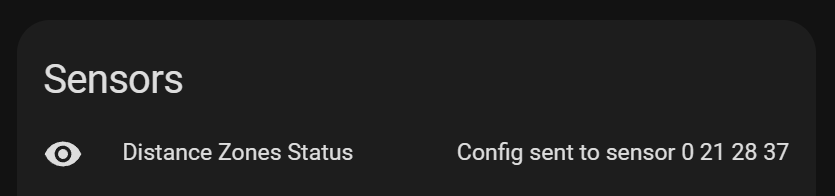
The numbers in the error message are “segments” of the distance set above. The first number is zone 1 start, second number is zone 1 end, third number is zone 2 start, fourth is zone 2 end and so on. These numbers can be multiplied by 15 to get the value in cm, corresponding to what you set in the sliders. Confusing/complicated I know, working on it.
Turning off LEDs
The EP1 has two LED’s that will be visible, both of which can be turned off.
The mmWave LED disables the LED on the mmWave sensor itself which flashes when in use and the ESP32 Status LED disables the LED on the EP1 board: